
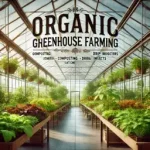
How to build a pallet greenhouse: A Pallet Greenhouse is the best way to grow plants. You create it with old wooden pallets. These pallets make the partitions and floor. You can even make shelves with them! It is a smart way to use stuff again and not throw it away.
Using old pallets saves you money. It’s also good for Earth. It stops waste and means we don’t need to make new stuff. Plus, it makes your garden look really neat and special.
How to Build a Pallet Greenhouse DIY

Building a greenhouse from pallets is not only eco-friendly but also budget-friendly. In this section, we’ll walk you through a step-by-step guide to constructing your very own Pallet Greenhouse.
Materials Needed
- Wooden pallets (approximately 20-30, depending on size)
- Screws and nails
- Hammer and screwdriver
- Measuring tape
- Drill
- Saw
- Heavy-duty plastic sheeting or greenhouse plastic
- Staple gun
- Hinges for the door
- Latch for the door.
- Optional: Paint or wood stain for aesthetics
Step 1: Gather Your Pallets
Collect enough wooden pallets for your project. Make sure they are in good condition, without any rot or damage.
Step 2: Plan Your Layout
Before you start building, plan out how large you want your greenhouse to be and how you’ll arrange the pallets.
Step 3: Prepare the Ground
Clear the area where you’ll place the greenhouse. Make sure it’s level and free of any debris.
Step 4: Build the Base
Lay down your first layer of pallets to form the base of your greenhouse. Secure them together using screws.
Step 5: Construct the Walls
Stack additional layers of pallets on top of the base to form the walls. Secure each layer with screws.
Step 6: Install the Roof
For the roof, you can either use more pallets or a different type of wood. Cover it with heavy-duty plastic sheeting or greenhouse plastic.
Step 7: Add the Door
Choose one side to be the entrance and install hinges and a latch to a pallet, which will serve as your door.
Step 8: Cover with Plastic Sheeting
Cover the walls with heavy-duty plastic sheeting or greenhouse plastic. Use a staple gun to secure it in place.
Step 9: Secure Everything
Go around and make sure all screws are tight and that the structure is sturdy.
Step 10: Optional Finishing Touches
If you like, you can paint or stain the wood for a more polished look.
Upcycled Pallet Greenhouse

Why using old pallets is a good idea for making a greenhouse. We’ll also tell you where you can find these pallets.
Why Use Old Pallets?
- Save Money: Old pallets are often free or really cheap. It makes your greenhouse project cost less.
- Good for Earth: Using old pallets means you’re recycling. It is a good thing to do for our planet.
- Cool Look: Your greenhouse will have a special, rustic look if you use old pallets.
- Strong and Lasts Long: Pallets are made to carry heavy stuff, so they are strong and will last a long time.
- Easy to Get: You can find old pallets pretty easily, so getting what you need for your project will be easy.
Where Can You Find Old Pallets?
- Shops Near You: Many local stores get stuff delivered on pallets. They can give them to you for free.
- Online: Websites like Craigslist or Facebook Marketplace sometimes have free or cheap pallets.
- Places That Recycle: Some recycling places have a section for things like pallets that can be used again.
- Building Sites: Sometimes, you can get pallets from places where they are building things. Just make sure to ask first.
- Ask People You Know: Your friends or family might have some pallets they don’t need. Just ask!
Pallet Greenhouse Plans

Why planning is super important when you’re building a pallet greenhouse. we’ll also give you some sample plans to help you get started.
Why Is Planning So Important?
- Avoid Mistakes: Planning helps you think of all the steps you need to take. It means you’re less likely to make mistakes.
- Save Time and Money: When you have a plan, you know what you need. It saves you time and money because you won’t buy stuff you don’t need.
- Better Results: A good plan helps you build a better greenhouse. You’ll know where everything goes, so it will look and work great.
- Less Stress: Building something big, like a greenhouse, can be stressful. But if you have a plan, it’s much easier.
Sample Plans and Layouts
- Basic Rectangle: This is the simplest plan. You make a rectangle with pallets for the walls and then add a roof.
- L-Shape: This plan gives you more room for plants. You build it like the letter “L.”
- Two-Level: This plan uses pallets to make shelves inside the greenhouse. That way, you can grow more plants.
- With a Porch: This plan includes a small porch at the entrance. It’s a nice place to sit and enjoy your plants.
- Walkway in the Middle: This plan has a walkway down the center and plants on both sides. It makes it easy to take care of your plants.
Pallet Greenhouse Frame

How to Make the Frame with Pallets
- Get Your Pallets: Make sure you have enough same-size pallets.
- Put Pallets on the Ground: These pallets make the shape of your greenhouse.
- Tighten Corners: Use screws to make the corners tight.
- Make Walls: Put more pallets on top of the walls. Use screws to keep them together.
- Door Space: Leave a spot for a door. Use extra wood to make a door frame.
- Put on Roof: Use more pallets or plastic for the roof. Make it tight.
Tips to Make it Strong
- Use long screws for tightness.
- Put extra wood at corners for more help.
- Make sure the ground is flat before you start.
Small Pallet Greenhouse
Why Small is Good
- Easy to Make: Small means less stuff and less time.
- Less Money: Small costs less.
- Easy to Take Care: Small is easier to manage.
- Fits Anywhere: Small can go in a tiny yard or balcony.
How to Make it Small
- Use Fewer Pallets: Make a smaller shape.
- One Level: If small, keep it one level.
- Small Door: Use a small door, not a big one.
- Hanging Pots: Use pots that hang to save space.
Pallet Greenhouse Shelves
How to Make Shelves
- Measure First: Know the size before you start.
- Cut Pallets: Cut them to the size you want.
- Smooth Edges: Use sandpaper to make it smooth.
- Paint (Maybe): You can paint it if you want.
- Put Brackets: Use screws to put metal holders on the wall.
- Place Shelves: Put cut pallets on holders. Use screws to make them tight.
- Test First: Put light stuff on them first to make sure they’re strong.
How to Keep It Neat
- Use Labels: Know where each thing goes.
- Use Small Bins: Bins can hold small stuff.
- Keep Same Things Together: Like with like.
- Leave Room: Make it a little full. You need space to work.
Pallet Greenhouse Flooring
Flooring is often overlooked but is a key part of any greenhouse. It affects how you move around and how well your plants grow. In this section, we’ll explore flooring options for your pallet greenhouse and how to get the ground ready.
Flooring Options and Tips
- Gravel Flooring: Gravel is a good choice because it drains well. It’s also cheap and easy to put in.
- Concrete Slabs: These are more costly but are very durable. They’re good if you need a flat, stable surface.
- Wooden Planks: You can use extra pallets to create a wooden floor. Just make sure to treat the wood to prevent rot.
- Rubber Mats: These are easy to clean and provide a soft surface to walk on. However, they don’t drain well.
- Natural Soil: If you prefer, you can also use the natural soil. Just be aware that it can get muddy.
How to Prepare the Ground
- Clear the Area: Remove any rocks, weeds, or other debris from the area where your greenhouse will go.
- Level the Ground: Use a rake or hoe to make the ground as flat as possible.
- Lay Down a Weed Barrier: This is a fabric that prevents weeds from growing. It’s a good idea to put this down before you add your flooring.
- Install the Flooring: Follow the instructions for your chosen flooring type. Make sure it’s level and secure.
- Test the Floor: Walk around to make sure it feels sturdy. If it’s wobbly, you may need to add more support.
Pallet Greenhouse Cost
Building a pallet greenhouse is a fun project, but it’s important to know how much it will cost. This way, you can plan better and avoid surprises. Let’s look at the estimated costs and some tips to save money.
Estimated Costs for Building a Pallet Greenhouse
- Pallets: Free to $5 each – You can often find free pallets, but some places might charge a small fee.
- Wood Screws and Nails: $10 – $20 – You’ll need these to secure the pallets together.
- Weed Barrier: $20 – $40 – This fabric stops weeds from growing in your greenhouse.
- Flooring: $0 – $100 – The cost depends on what type of flooring you choose.
- Plastic Sheeting: $50 – $100 – This will serve as your greenhouse cover.
- Shelving: $0 – $50 – You can make shelves from extra pallets or buy pre-made ones.
- Paint or Wood Stain: $20 – $40 – Optional, but it can help your greenhouse look nicer and last longer.
- Miscellaneous Supplies: $20 – $50 – This includes things like a tape measure, drill, and other tools you might need.
Total Estimated Cost: $120 – $455
Tips for Keeping Costs Low
- Find Free Pallets: Look for businesses that are giving away pallets. It can save you a lot of money.
- DIY Shelving: Use extra pallets to make your shelves instead of buying them.
- Reuse and Recycle: Use any old materials you have lying around. Old windows, doors, or planks can be repurposed.
- Bulk Buy: If you need to buy materials like screws or nails, buying in bulk can save money.
- Plan: The more you plan, the less likely you are to make costly mistakes.
Pallet Greenhouse Ventilation
Why Ventilation Matters
- Fresh Air: Plants need fresh air to grow well.
- Less Heat: Ventilation helps to keep the greenhouse cool.
- Less Wet: It helps to keep the air dry, which is good for plants.
How to Add Ventilation
- Find Spot: Choose the best spots for vents. Usually, one high and one low.
- Cut Holes: Use a saw to cut holes in the pallet walls.
- Add Covers: Put covers or mesh over the holes. It keeps bugs out.
- Test: Open and close the vents to make sure they work.
Pallet Greenhouse Tables
How to Make Tables
- Measure Space: Know how big you want the table.
- Cut Pallets: Cut pallets to that size.
- Make Legs: Use extra wood to make table legs.
- Attach Top: Screw the cut pallets to the legs.
- Test Table: Put some weight on it to make sure it’s strong.
How to Use Tables
- Extra Space: Tables give you more room for plants.
- Easy Reach: Tables make it easier to reach your plants.
- Keep Tools: You can also keep your tools on the table.
Pallet Hoop House
What is a Pallet Hoop House?
- A hoop house is like a greenhouse but has a rounded top.
- It’s often covered in plastic, not glass.
How It’s Different
- Shape: Hoop houses are round on top, not flat.
- Material: Usually covered in plastic.
- Cost: Often cheaper to make.
- Space: Gives more vertical space for tall plants.
Pallet Greenhouse Tutorial
For Visual Learners
If you’re a visual learner, a video or pictorial tutorial can be a game-changer. Here’s how to make the most of it:
- Watch First: Before starting, watch the entire tutorial to get a sense of the project.
- Gather Supplies: As you watch, make a list of all the materials you’ll need.
- Pause and Play: Pause the video at each step, complete it, and then play the next part.
- Take Notes: Jot down any tips or tricks mentioned in the tutorial.
- Ask Questions: If the tutorial has a comment section, use it to ask any questions you may have.
Final Thoughts
Building a pallet greenhouse is not just a project; it’s an adventure in sustainable living. It’s a way to grow your food, flowers, and herbs, no matter the season. So why wait? Grab some pallets and start building your dream greenhouse today!
FAQs
Is it safe to use pallets for a greenhouse?
Yes, but make sure to use heat-treated pallets that are free from harmful chemicals.
How many pallets do I need to build a greenhouse?
The number of pallets you’ll need depends on the size of your greenhouse. A small greenhouse requires around 20-30 pallets, while a larger one requires 50 or more.
Can I use pallets for the flooring as well?
Yes, pallets can be used for flooring, but make sure to prepare the ground properly to ensure stability.
Do I need to treat the wood?
It’s a good idea to treat the wood with a sealant or paint to protect it from the elements.
How do I secure the pallets together?
You can use screws, nails, or brackets to secure the pallets. Make sure they are tightly attached.
Can I add windows to my pallet greenhouse?
Yes, you can cut out sections of the pallets and add Plexiglas or another transparent material for windows.
How do I add ventilation to a pallet greenhouse?
You can either leave gaps between some of the pallets or install vents or fans to ensure proper airflow.
Is a pallet greenhouse strong enough to withstand wind and weather?
If built correctly and anchored securely, a pallet greenhouse should be sturdy enough for most weather conditions.
Can I expand my pallet greenhouse later?
Yes, one of the benefits of a pallet greenhouse is that it’s modular. You can easily add more pallets to expand it.
Where can I find free or cheap pallets?
You can often find free or cheap pallets at local businesses, warehouses, or online marketplaces like Craigslist.